How To Fix Asus Aura Sync Not Working – Simple Steps to Fix Permanently
Alright, a lot of users with RGB lighting strips use the official Aura Sync utility. The application makes controlling their components so much easier as well as efficient. But, not everyone is able to enjoy the various features the Aura Sync app has to offer. A number of people make errors while installation and often wonder Why is Asus Aura Sync Not Working.
Asus Aura Sync might not be working on your system due to a number of errors. Corrupted installation files, Misconfigured drivers, poorly connected RGB headers, Outdated Apps, and Third-party softwares might cause issues which in turn, prevent the working of the utility.
To fix this problem, you can try reconnecting RGB headers, uninstalling other RGB sync softwares controlling your RGB components, replacing your components with Aura sync compatible strips, or just reinstalling the application again.
If you find yourself in the same situation and want to fix it as soon as possible, then we’ve got you covered. In this article, we will discuss step-by-step fixes for Asus Aura Sync Not Working.
Contents
What is Asus Aura Sync
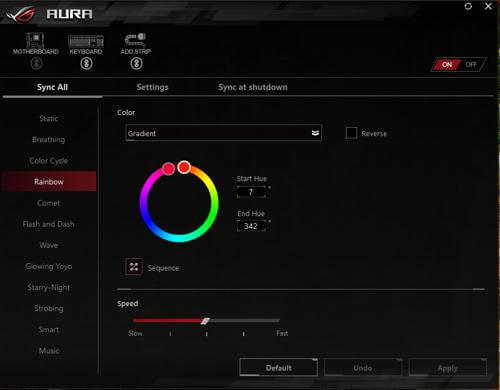
Asus Aura Sync is a utility that allows users to control and manage hardware components from their system. Users can change the status of their LED strips, turn them on/off, and customize their working according to their needs.
You can also synchronize your Asus hardware components so that your setup looks attractive. The app is a one-stop destination for all your lighting needs.
Possible Problems with Aura Sync App
You might be facing certain issues with the application. There are a number of problems associated with the Aura Sync application. Below we have mentioned some of the most obvious issues that you might face after installing the software.
App Does Not Open
A majority of users face the unresponsive app icon issue with the software. You might be clicking the app icon to launch it, but in return it does nothing. Keep in mind that running the program as an administrator does not work in this case. There is a working fix for this issue that we have mentioned in the next section.
Asus Aura Stopped Working
Many applications have been known to cause this error on the Windows operating system. You might be customizing your Asus components and suddenly, you get a message saying that the app has stopped working. Do not worry, as there is an easy fix for this issue as well.
Can’t Use In-App Buttons
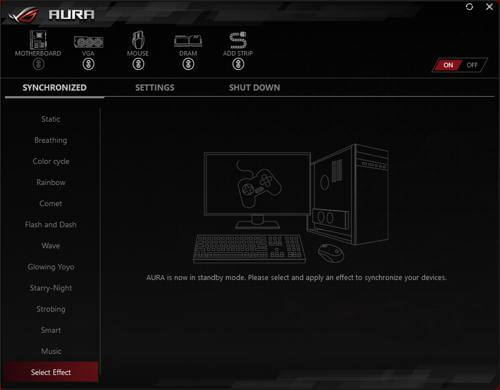
There might be a case when the application works fine but, the buttons and options in the app do not respond to your clicks. It happens because the application is not able to scan the hardware components. In turn, it disables the respective buttons so that the user is not able to access unwanted settings.
The interactive buttons are colored white and the disabled ones are grey. This is a common issue that several people have faced with their systems.
Unable to Sync Components
This is one of the most common issues that people face while setting up the Asus Aura Sync application on their system. In this case, the hardware components do not sync with each other even after the user has added the necessary commands. This might happen if you have incompatible components or any other misconfigured settings.
Can’t Detect Motherboard
Not detecting Motherboard is the most serious problem of all. In this situation, the application can not detect your system’s motherboard, which further leads to no control over the components. If the application is not able to detect the motherboard, you won’t be able to manage the RGB lighting components.
Why is Asus Aura Sync Not Working
There are a number of reasons why the app is not working. Below, we have mentioned some of the obvious ones for your better understanding.
Installation Path Issue
If during installation, you chose a custom installation path for the Asus Aura Sync app, then you might face the Aura Sync Not working issue on your system. This is because the app is not configured to run with custom installation paths. This is a known bug in the software that might be fixed in the upcoming versions.
Corrupted Installation File
Sometimes, corrupted installation files are the main culprit in the whole scenario. Misconfigured or corrupted files can break your installation and the application might not work well post-installation. In this case, all you need to do is download a fresh archive of the software and then install it accordingly.
We recommend you check out this guide on How to download Asus Aura Sync App so that you do not face any issues again.
Third-Party Application
There might be a case when a third-party application might be tampering with the working of the Aura Sync app. In this case, all you need to do is find and uninstall the disturbing application from your system.
Operating System Issue
Windows Operating System came up with a new Fast Startup feature that allows the system to start quickly. This feature might have its own advantages but on the other hand, it has some drawbacks as well.
This feature can cause issues with the Aura Sync app, in turn, not allowing it to work properly.
Poorly Connected RGB Strips
If you have RGB strips connected on your system, then make sure that they are plugged-in correctly. This is because poorly connected LED strips can not be scanned with the Aura Sync application.
Outdated Aura Sync App
Outdated apps contain many known bugs that are fixed in the next update. Keep in mind that you should update your apps as soon as a new update is released. This will ensure that your software is free of bugs and works correctly.
How To Fix Asus Aura Sync
Now that you know what caused the error on your system, it is time for you to get rid of it permanently. Below, we have mentioned 4 working methods that will fix your issue in no time.
1. Reconnect the RGB Headers
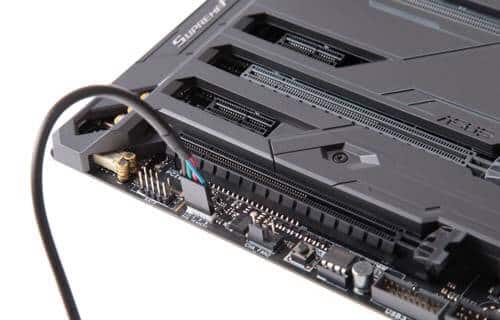
Sometimes there is a case when the RGB headers connected to your motherboard are loose. The Aura Sync application can not scan the hardware for these RGB lights, in turn, the app does not work properly.
To fix this issue all you need to do is check the RGB connections and make sure that they are connected properly. We recommend removing and plugging them again.
2. Uninstall Third-Party Apps
Many third-party apps require hardware control permissions from your system. These may include other RGB control software as well. If you find any such application installed on your system, then remove it immediately. This is because these apps create conflict with the Aura Sync app.
To remove an application from your system, check out the steps below.
- Click on the Start Menu button located on the bottom-left of your screen.
- Search for Control Panel and open it.
- Select an option named Programs and Features.
- You’ll be presented with a list of all the installed programs and applications.
- Find the third-party app and double-click on it to remove it from your system.
That’s how easy it was to fix the Asus Aura Sync Not Working issue.
3. Disable Windows Fast-Startup
Fast Startup is a Windows feature that causes an issue with the Aura Sync. Though this feature does not create problems while installing the app, it may lead to some errors after the installation. Therefore, it is preferred that you disable this feature just to be on the safer side.
To disable Windows Fast Startup feature, follow the steps given below.
- Click on the Start Menu button located on the bottom-left of your screen.
- Search for Control Panel and open it.
- Select Power Options and Choose What The Power Buttons Do.
- Click on Change Settings that are Currently Unavailable.
- Then toggle the Fast Startup option to disable it.
- Click on Save Changes are reboot your PC.
The Fast Startup feature will now be disabled on your system.
4. Reinstall The Aura Sync App
Sometimes the Asus Aura Sync App does not install properly because of corrupted files or other installation issues. This may lead to the not launching or unresponsive errors on your system.
To make sure the app is installed correctly, you can try reinstalling it.
How to Install Aura Sync The Right Way
If you have faced an issue while the installation of the app, then do not worry as we have got you covered. In this section, we have provided a complete guide on How to install Aura Sync App correctly. Follow the below-given steps to proceed.
- Download the Asus Aura Sync App from here (Latest version Preferred).
- Locate the archive file on your device storage.
- Extract the file using an archive manager (7Zip works best).
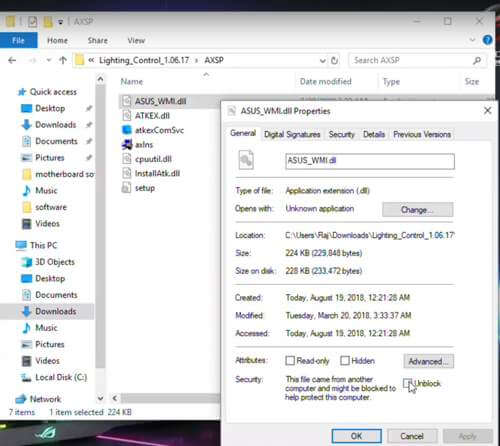
- Right-click on each file and open their Properties.
- Locate Unblock and check it. Hit save. (Do this for each file)
- Double-click on the files named axlns and atkexComSvc.
- Go back, and install the application using the setup file.
- Reboot your system after the installation.
This is the correct way of installing the Aura Sync application on your system.
Frequently Asked Questions
Q: What if my app is not installed correctly?
A: If the app is not installed correctly, you can refer to this guide and install it on your system.
Q: What causes errors in the Aura Sync application?
A: The error is caused by a number of things. Some of them are:
- Installation Path Issue
- Corrupted Installation File
- Poorly Connected RGB headers
- Third-part applications
- Outdated App
- Operating System Issues
Q: Will this application require extra power?
A: No. The application won’t require any extra power and will work on the power supplied by your PSU.
Q: How can I sync components with each other?
A: To sync components with each other, you can use the Aura Sync application with Aura Sync compatible components.
Final Words
So that was our take on the Asus Aura Sync App. We discussed a number of things such as the possible issues with the app, why Asus Aura Sync not working and various ways to fix it on your system. Lastly, we also answered some of the frequently asked questions to clear out the fog.

