Wondershare Filmora 9 Review – A Straightforward Video Editing Software

Ever since the internet has become cheaper, people are shifting more towards video content and platforms such as Youtube. If you ever had a thought of trying vlogging or making short films but stepped back because you don’t know video editing, we have something for you.
Wondershare Filmora9 is a video editing software that simplifies the process of editing videos. There’s no need to watch youtube videos on how to use Filmora9 or search for a course on udemy.
Filmora 9 is a simple and feature-packed video editor that you can learn to use by just messing around with the features for an hour or so. Learning Filmora9 isn’t as hard as learning Final Cut Pro, Adobe Premiere Pro or Sony Vegas, Filmora9 is a straightforward video editing app.
If you have any experience with Kinemaster editor on your android smartphone, there’s a way to use the app on your desktop as well. Check out this article on How to use Kinemaster for PC.
There’s a lot to know about Filmora9, let us start with its features.
Contents
Wondersahre Filmora 9 Features
As aforementioned, Wondershare Filmora 9 is a feature-packed video editing software for Windows as well as macOS. One of the best things I like best about the Cross-Platform capability is that I can now edit the video footage in my Windows computer on office, and then achieve the project, upload it to Google Drive, DropBox, or flash disk, and edit it on my Mac computer at home. It has all the features you will be needing while editing your first short film or your first youtube video.
Powerful editing tools
Wondershare Filmora 9 comes with advanced video editing tools that let you cut, reverse video, add filters to make the video look more stunning, add text, overlays, transitions to fill up the spaces between two videos, and more.
Import Media files quickly
It is quite irritating to import individual files from a folder when you are working on a big project or have various video and audio clips to be stitched together. In Wondershare Filmora 9, you can import the media folder in just one click.
All you have to do is click on File >> Import Media >> Import Media Folder. Now select the folder that you want to import and that’s it. The selected files in the folder that you imported will show up My Album.
High Quality Renders
As compared to the other video editing Softwares for PC, most of them had no proper exporting features, a lot of formats, rendering settings that are essential for a video were missing.
Upload on Video Platforms:
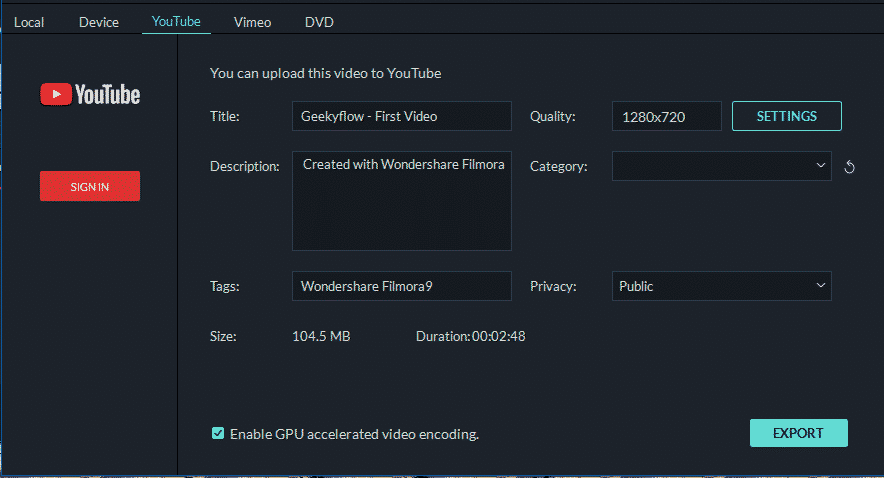
Wondershare filmora 9 lets you export videos for smartphone formats, such as iPhone series, Android Tv, Playstation, Xbox, Sony Tv, and more. If you are a creator on Vimeo or youtube, you can sign in to your account and directly upload videos.
Burn into DVD:
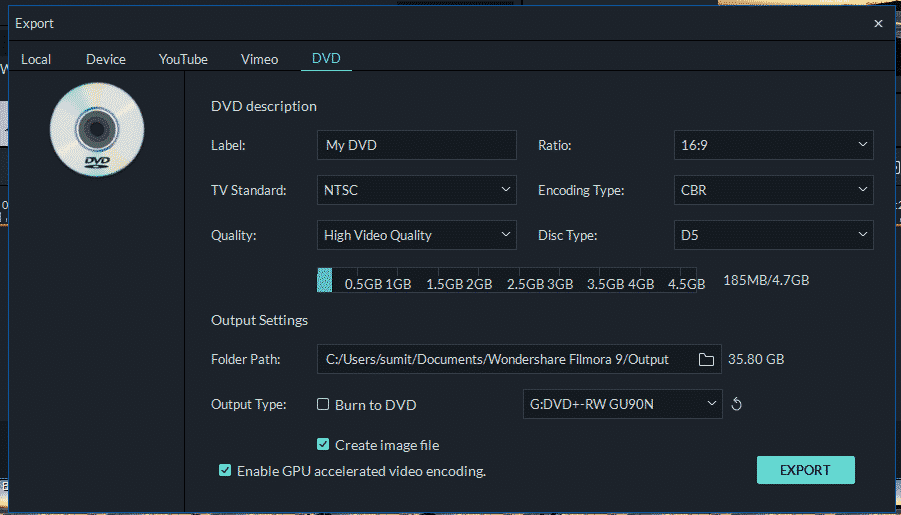
You don’t have to rely upon any other software or app to burn your video file in a DVD because Wondershare filmora 9 will do it for you.
Use the export option and select the DVD option, now customize the settings as per your requirements and burn the video file in your DVD.
Filmora audio editing tool:
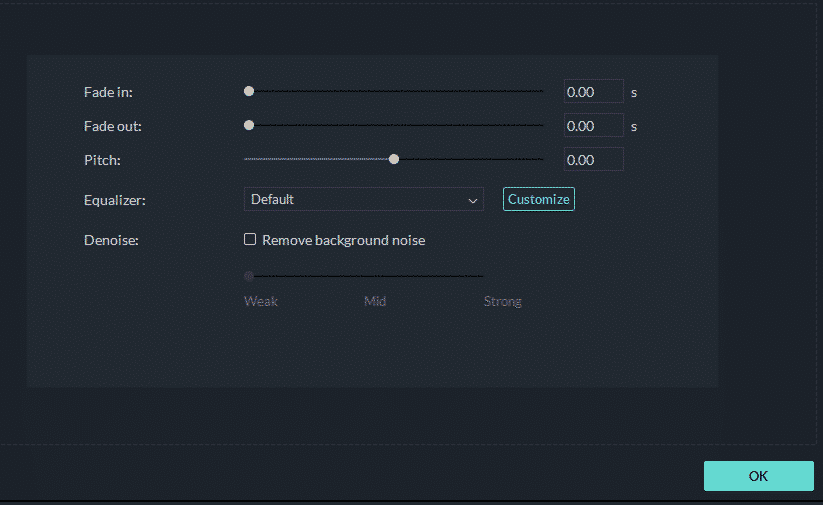
Filmora is packed with a basic audio editing tool that gives you control over the audio file you want to add in your video. Once you drop in an audio file, double click on it, pitch it up, add in and out faders, remove background noise and adjust master volume.
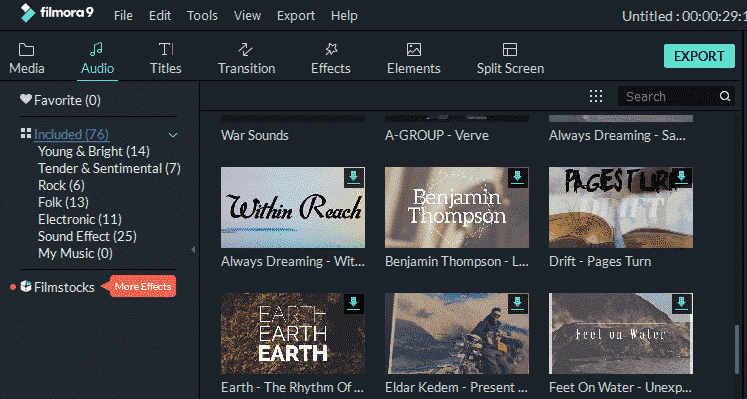
Other than this, filmora 9 comes with 50 free music tracks in various genres that you can use according to the mood of your video. If the free tracks don’t fit in with your video, sync your iTunes library or just drag and drop your audio file from your computer.
Some more features:
- 4K video editing and rendering
- Action Cam tools
- Green screen (Chroma key)
So, these are features of Wondershare filmora 9. There’s a lot more to explore in filmora, and you should give it a try and edit videos for your Youtube channel or Facebook pages.
Wondershare Filmora 9 pricing
All of these features and ease of video editing comes at a price. Although there is a free trial version of Wondershare Filmora 9 it has some limitations that you would want to unlock in the future.
The best thing about Filmora’s trial version is that it has all the features unlocked, but the exported video will have a watermark. You can get rid of the watermark by purchasing a valid license.
Currently, Filmora9 offers a life-time license (One-Time Fee) and an annual subscription plan. You can choose one that meets your needs. There is also a discount plan for educators and students who want to use Filmora for educational purposes, I think that helps.
Note: Sometimes Filmora9 will provide *-day trial version without a watermark in the output. If you’re interested in getting the special offer, you should register a WSID and stay tuned on the website. There are several campaigns on their website.
Pricing:
There is also a plan for educators and students who want to use filmora for educational purposes. The plan starts from US$7.99 and can be availed by filling up a form.
Trial Version Limitations
Filmora is quite affordable as compared to other video editing software. But, if you wish to try filmora before starting to pay for it, go with the trial version.
The best thing about filmora’s trial version is that it has all the features unlocked, but the exported video will have a watermark. You can get rid of the watermark by purchasing a valid license.
Platform Support
The best thing about Wondershare filmora 9 is that it supports various platforms such as Windows, and Mac. The best part is that filmora is also available for android and iOS mobile but it is completely different than the desktop version.
Getting Started With Wondershare Filmora 9
Filmora 9 is straightforward and easy to use video editing software. If you have installed the software on your PC already and wondering how to start a new project, follow the instructions below.
- Firstly, make sure you have installed the video editing software on your desktop. The icon will appear on the home screen by default, double click to launch the program.
- The project screen will open where you can choose to work on an existing project or create a new one. Here, you will have to choose a “new project” as you are a new user.
- Just click on the new project and the editing screen will appear. This is your workspace, you can add media files, add texts, transitions, overlays, split-screen, and do a lot more to your raw footage.
- You should now import media files to get started with your first project. We recommend you create a separate folder for your projects and keep everything in one place. Filmora lets you import the media folder, therefore it would be easier for you to import necessary files at once.
- File >> Import Media >> Import Media Folder, to import the media folder.
- Drag and drop the video clip to the timeline, split video and cut out unwanted frames, add some text and titles, or change the video speed as you like.
- That’s all. You have successfully started your new project and the final result will show your creativity. You can mess around with the features and learn to use filmora 9.
Final Words
So, in this article, we have discussed some main features that I like about Wondershare Filmora9. Being a user of Filmora9 since version 8.5.3, I’d say that the video editing software has come a long way with an improved user interface, user experience, features, and stability. Even though there are professional video editing software like Adobe Premiere, Sony Vegas, and whatnot, I’d recommend you to start with Filmora9, you don’t have to learn for hours to start using it.
Apart from this, the pricing is justified while looking at the features offered by Filmora9. The exporting features are simply astonishing and save you a lot of time by providing direct uploads to Youtube and Vimeo and burning video files to a DVD drive.


