How to Change Ink on Epson Printer
Epson is an established brand in the printer market and is known for producing high-quality printers that are durable and provide excellent print quality. The Epson manufactures printers for all price segments and kinds of users.
Epson primarily produces two types of printers in terms of ink, the traditional cartridge-based printers and modern, high-capacity ink tank-based EcoTank printers. There are many differences among different models, but the method of changing the ink cartridge or refilling the EcoTank, as the case may be, is similar.
So, if you are looking for an answer to how to change ink on your Epson printer, you have arrived at the correct place. In this article, we have described how to change ink on your Epson printer, along with all the necessary precautions.
First, you need to check the present ink levels on your Epson printer to know the need for changing the ink. Here is how you can check ink levels on your Epson printer.
Contents
How to Change Ink on Epson Printer: Find Out
1. Check ink levels on your Epson printer.
If the printer is not informing you that it needs more ink and you want to know which one, cartridges are over, you may monitor the amount of ink left in your printer by following these steps:
- Click the Home Button, which has the HOUSE symbol on it.
- Navigate to Setup and then click the OK option.
- Simply select Ink Levels as the initial option and press the OK key.
- On the LCD panel, you can now monitor the amount of ink left in your printer.
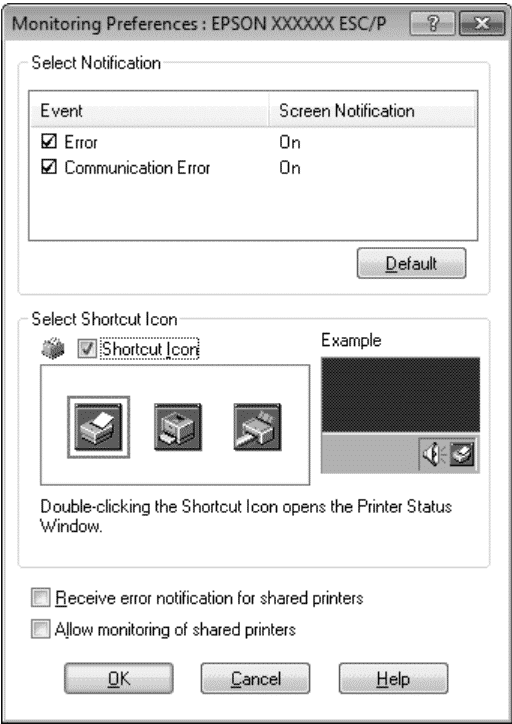
Epson provides the Epson Status Monitor application for Windows and macOS. You can also use this application to manage your printer and perform tasks like checking ink levels on your printer.
2. Installing a new ink cartridge
Installing a new ink cartridge on your Epson printer can be done simply by following the below steps.
- Make sure that your printer is turned on.
- Open the lid of your print. If you have an all-in-one printer, you need to elevate the scanner unit.
- If the LCD panel displays a notification concerning low ink levels on your printer, hit “Ok.” If the message is not visible, navigate to the “Setup” option. Choose “Maintenance.” Then, select “Ink cartridge replacement.”
- Check to see if the print head is in the changing configuration. If that is not the case, click the “Maintenance” option. You should refrain from changing the print head configuration with your hands.
- Once the print head is in the replacement or changing configuration, you can open the cartridge cover.
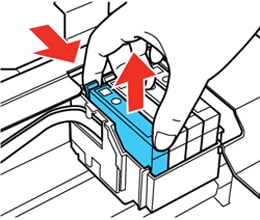
- Now, you need to press the button at the end of the cartridge.
- Next, you need to pull the cartridge out of its slot while keeping it straight.
- Before removing the new ink cartridge from its package, it is good to shake it a few times.
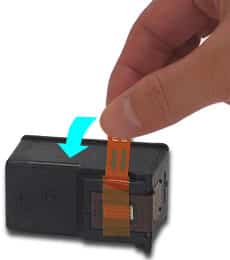
- The new cartridge will have yellow tape on it. You need to remove the tape and ensure that all other seals are intact. If any additional seal is broken, the ink might leak, spoiling the cartridge and the interiors of your printer.
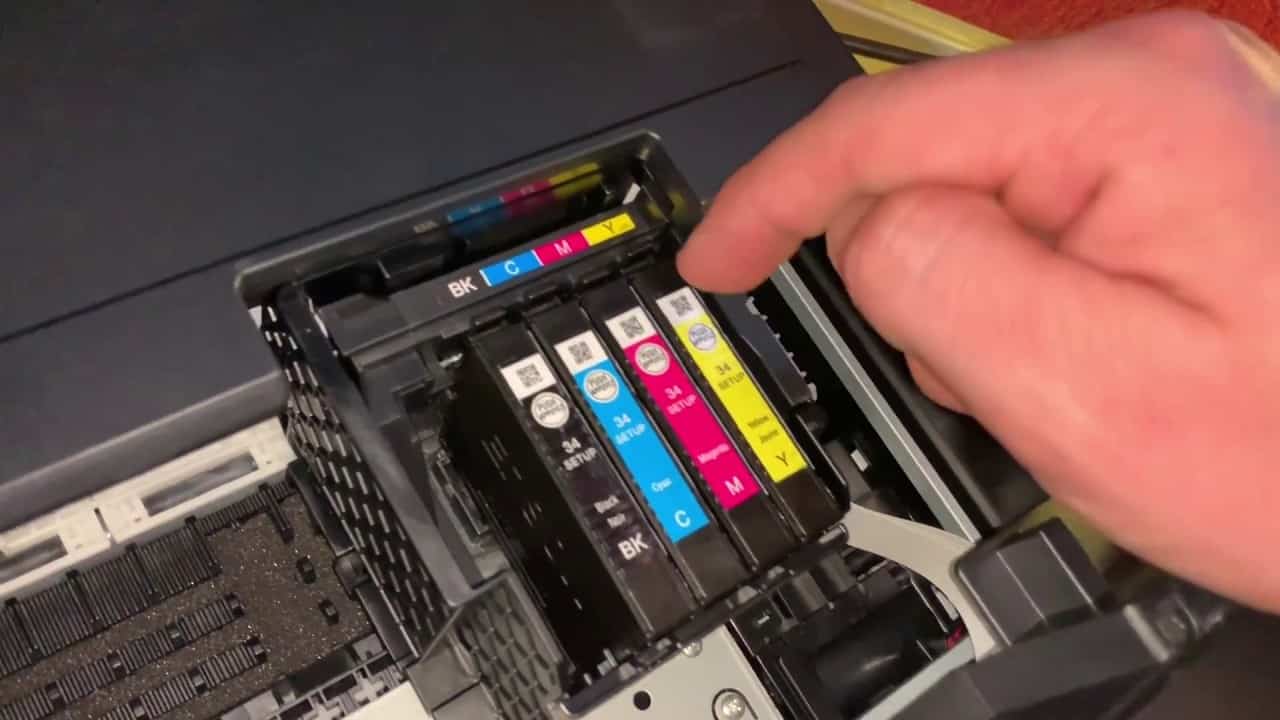
- Insert the fresh ink cartridge into the slot. Keep pushing it down until you get a clicking sound.
- Finally, shut down the lid of your printer.
- Look for the “Maintenance” button on your printer after you have placed the cartridge in position. If you do not have such a button on your printer, you can simply press “Check” or “OK.”
- It is good to print a test page to check whether the ink cartridge has been installed correctly.
3. Refilling the EcoTank
Epson has a line of EcoTank printers that work on large-sized ink tanks instead of the traditional ink cartridges. Some other brands have also started providing ink tank printers because these last longer and significantly reduce printing costs.
Refilling the ink tank of your Epson EcoTank printer is easy and can be done by following these steps.
- To avoid coloring your fingers, put on plastic gloves. Keep wet paper napkins nearby, and, in the case of spillage, tidy up the ink immediately to minimize permanent damage. If ink falls on your garments, the stain may not disappear entirely, no matter how well you wash them.
- To avoid ink spatter or spills on your desk or floor, put some sheets of newspaper underneath your printer.
- Remove the ink tank lid. Each ink jar has a top that unfurls the ink nicely. Remove the stopper and insert it in the EcoTank’s holder. DO NOT place it on your desktop or your clothes since it may be stained with ink.
- Set aside the cap of your fresh ink bottle. But do not lose sight of it or throw it away as you may replace it and preserve your unused ink for the future. Remove the cap gently and strip away the seal if there is one. Replace the lid, and you are all set to begin refilling.
- Pour the ink such that the tanks of each color fill all the way up to the top line.
- To keep any leftover ink, put the lid on the ink container and place the container in a dark place, and leave it erect.
- Put back the lid of the ink tank and repeat the process for all colors. Close the cover of your printer, and you will be ready to go.
- Lastly, you need to hit the “Maintenance” button. If you do not have such a button on your printer, you can simply press “Check” or “OK.”
- Print a sample page first to check whether the printer is working fine.
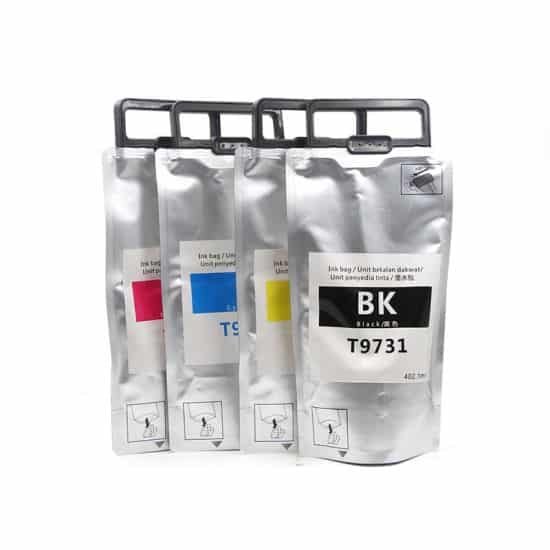
Some newer models of the EcoTank printers work on ink supply tanks instead of individual color bottles. This is done to make the printers eco-friendly by reducing waste. It also reduces the incidents of ink spills and leakages. For such printers, you can perform the following steps to change ink.
- When there is less or no ink left in the ink pack, an alert will appear on the LCD screen of your printer, showing which ones need to be replaced. Individual ink colors have their supply pouches.
- To access the ink packs, open your printer’s side pocket. The ink bag you’re changing will pop out by pressing the lever.
- To detach the bag from the ink compartment, hold and raise the level straight up.
- Remove all the protective coverings from the fresh ink pack. Ensure that you do not hold the green chip on the handle. Shake the bag laterally sideways about thirty times. You must remove any seal since these may allow ink to spill out.
- Put the pack inside the container, ensuring that the ink pack’s lower portion goes into the slot tightly.
- Move the pack’s level onto the holder and press Press the lever into position until you hear a snapping sound.
- To confirm that the ink packs are correctly inserted, press “Check” on the LCD panel.
- After this, your EcoTank printer is ready to print on again.
4. Replacing a remanufactured ink cartridge
In the first place, you should always try to install fresh ink cartridges on your printer. However, if you choose to install a remanufactured cartridge, you must be careful and follow the correct procedure. Any mistake might lead to spillage and leakage, ruining your clothes, work desk, and fingers.
The steps to replace a remanufactured Epson ink cartridge are.
- First, you need to turn off your Epson printer’s power supply and unplug the power cord.
- You must now wait for 20 seconds.
- Next, have a look at your printer’s ink cartridge.
- You need to remove the cartridge carefully. Ensure that you do not jiggle or tilt the cartridge and that it is straight.
- You must use a non-lint piece of cloth to wipe the gold chip on the ink cartridge. Since the chip is susceptible, bits of dust or ink residue might harm the chip, preventing it from interfacing with the printer producing errors.
- Remove the new ink cartridge package.
- Carefully install the new ink cartridge.
- After installing the new cartridge, put the lid on your printer.
- Next, connect the power cord to your printer and turn it on.
- Wait for some time for your Epson printer to process the new ink cartridge.
- It is advisable to print a test page to confirm that the cartridge was installed correctly and is functioning well.
The printer is not working after changing the ink.
If your Epson printer is not working after you have changed the ink cartridge or if it does not recognize your ink cartridge, then you might resolve this problem by the following methods.
Bypass Cartridges Monitoring
There might be an instance when your printer fails to detect the cartridge or shows that the installed cartridge is empty. In such cases, you should try to avoid cartridge checking through a cartridge reset. You can do so by following the steps mentioned below.
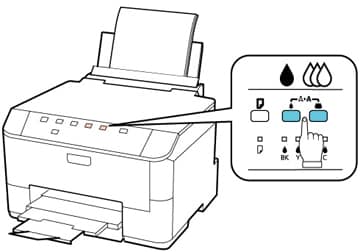
- Open the top cover of the printer and press the Ink button.
- The ink cartridge holder will move to an appropriate position to make the cartridge accessible.
- Then, you need to open the cover of the cartridge that is “out of ink” as per your printer and simply close the close without removing the cartridge.
- Now, you need to close your printer, and your printer will be ready to print again.
Remove the tape on your cartridge.
Every ink cartridge comes with some sort of taping or protective covering to prevent spills and leakage. Such tapes block the spout so that the ink does not spill during shipping.
Many users tend to forget about the protective tapes and place the cartridge inside the printer. If you do not remove the tape, no ink will come out from your printer. Thus, make sure that you remove the tape or any other protective covering on your cartridge.
Solving any refilling issues with your ink cartridge
If you are a friend of the environment and believe in getting your cartridges refilled instead of purchasing new ones, you contribute significantly to the environment and probably save you a lot on your printing expenses. Getting your ink cartridges refilled is an excellent alternative to purchasing a new cartridge, but it has its challenges.
If the refilling process is not done correctly, you are bound to face issues while printing. There can be many issues like air entering in the cartridge, ink not reaching the bottom of the cartridge, and preventing your printer from drawing ink out of your ink cartridge.
Let the ink cartridge stand straight for about an hour or so to solve issues like these. You can also tap the cartridge so that the ink settles down.
Run an extended self-cleaning cycle
Many modern printers come with self-cleaning ability. If your printer cannot detect your cartridge or if it says that there is no ink in the cartridge, the ink might be clogged somewhere, and you will have to run a cleaning cycle. You can initiate an extended cleaning session by pressing the “Clean” button for more than three seconds.
Your printer will take care of minor clogs and dry ink. After performing the extended self-cleaning cycle, you need to restart your printer, and it must be ready to print again.
Precautions
While refilling ink, a few precautions must be taken to ensure that there is no harm to your printer and that the ink cartridge is installed correctly. You must be careful while handling the cartridges as they are prone to spill.
Before removing the empty cartridge, always keep the new cartridge ready for installation. If the print head is exposed to air for a long time, it might get clogged. It is difficult to clean, and you might also need to get it replaced.
Since the printer ink stains your hands and clothes, clean it immediately with soap and water if you drop some on yourself. It is preferred if you wear disposable gloves while changing the ink of your Epson printer. Also, if the ink enters your eyes, wash them immediately with cold water. If it enters your mouth, spit it out immediately.
Conclusion
Thus, the article on how to change ink on your Epson printer ends here. I have tried to mention all the methods you can use to change ink, along with a guide on what to do if your printer rejects your cartridge.
In the end, I have also mentioned some precautions which you must take so that you do not harm your printer or waste your cartridge.
Solutions for users having traditional ink cartridge-based printers and modern EcoTank printers have been provided in the article. I hope you find the article helpful and it has answered all your questions and offers extra information on changing ink. I would appreciate it if you shared the article with your friends and family.
Related Articles

